
Create an Inline Menu Telegram Bot using Node.js & grammY
Intro
This guide is a quick start into creating a inline menu based Telegram Bot using Node & grammY. This guide started out as a short-ish tutorial but it seems its now a fully beginner friendly guide from start to finish, every step is covered. If you came here for just code, I’m sorry!
Requirements
- Node 18+
- grammY
- Basic JavaScript Knowledge
Prerequisites
First create a folder somewhere on your computer, open it and run the below commands inside it using any Linux terminal or shell.
The following commands will set up your project with full licence, author, git and .gitignore for node.
Enter each command one by one. Instead of npm we will be using pnpm. If you don’t have pnpm yet you can install it with npm or via standalone script from the pnpm website.
curl -fsSL https://get.pnpm.io/install.sh | sh -or
npm install -g pnpm // -g flag installs globallyIf you don’t yet have Node.js, I’d suggest using Node Version Manager. Installation is simple and you can switch node versions whenever you need to, plus install multiple versions of node.
curl -o- https://raw.githubusercontent.com/nvm-sh/nvm/v0.39.3/install.sh | bashThen just type nvm install node. This will install the latest version for you.
nvm install nodeProject Setup
pnpm init -y  // Initialize node, creates package.json
npx license MIT  // Add MIT license file (Optional)
npx gitignore node  // Add gitignore for "node_modules" and .env
npx covgen [email protected]  // Add Author email to project
git init  //initialize git repo (this is not GitHub, just Git)
Create the bot.js file
touch bot.jsCreate a .env file to store the Botfather token.
touch .envInstalling Dependencies
We need to install the grammY framework and a couple of other packages, dotenv is for our .env file.
pnpm i grammy dotenv --saveThe file and folder structure should look like:
/project-root
  |-- /node_modules/
  |-- package.json
  |-- pnpm-lock.json
  |-- bot.js
  |-- .env
@Botfather
Time to create our bot on the telegram servers before we can link our code to it we need an API key. Telegram calls it a API TOKEN, this is so we can communicate with Telegram and our bot securely with a unique identifier. Do not leak your API Tokens or your bot will break and you will have to generate a new token.
Click https://t.me/BotFather or search for @BotFather on mobile/cell-phone Telegram app.
I will explain how to type our commands for speed, if you want to use the GUI click the blue Menu button, it functions exactly the same its only preference.
In the @BotFather chat, lets fire off some quick commands to get our bot ready.
Send each one separately and follow the prompts.
/newbot BotFather says “Alright, a new bot. How are we going to call it? Please choose a name for your bot.” This is the display name of our bot and can be changed so don’t worry about this question too much just pick a name.

Next BotFather asks "Good. Now let's choose a username for your bot. It must end in bot. Like this, for example: TetrisBot or tetris_bot." This answer needs some thought because it will be permanent, unless its a test bot, in which case call it anything with bot on the end.

//Bot name examples - They look the same but all are different.

menubot-bot
menubot-Bot
menubot_bot
menubot_Bot
menubotbot
menubotBot
menubot
menuBot
Names are case sensitive so you can see above there are many variations on essentially the same name but EVERY example is a totally different name and a different bot entirely. All you need is bot at the end.
Finishing up our bot on Telegram servers. All we need now is a quick description and maybe a Botpic/Avatar.
/setdescription //This command sets the description for the bot's main page and is shown to everyone who visits.
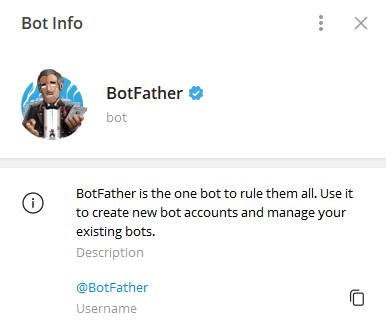
/setabouttext //This command sets the about text which is shown when someone clicks on the topbar on your bot (see image below)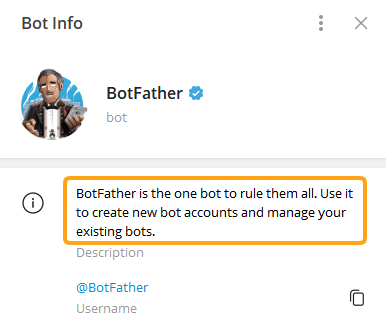
/setuserpic //Add an avatar to your botNow all we need to do is grab our API token.
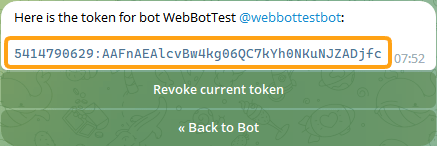
Click or type /mybots. Select the bot you have created, then click API Token to view the token.
Now all that’s out the way we can start writing some code finally.
While we have our token at hand, let’s add it to our .env file like below
BOT_TOKEN=6119649958:BBHmRKkG87YyRadufoFlrFhF1aX5hx59r8ALet’s go back to our bot.js file, open it up in whatever editor you like. If you are a beginner try VSCode.
Some Code!
So in our bot.js we will have everything we need apart from our token in our .env file.
We can start by importing our dependencies. The full bot.js will be below, I will just split it up here to give some explanation.
// Import the grammy library
const { Bot } = require("grammy");
const { Menu } = require("@grammyjs/menu");
// Load environment variables from .env file
require("dotenv").config();// Initialize bot with bot token from .env file
const bot = new Bot(process.env.BOT_TOKEN);// Handle '/start' command, can be used for other commands, see below.
bot.command('start', (ctx) => {
ctx.reply('Welcome to the bot!');
});The code-block below is an inline menu. Ill try and explain the structure. The const is always different, see const main, const settings and const nextlevel. These are just names for each menu structure and we link the menus together by stating the .submenu The first is the word on the button, the second is the name of the menu to be called. .row() will start a new row of buttons and .back("Go Back") takes you back a step in the menu.
const main = new Menu("root-menu")
.text("Welcome", (ctx) => ctx.reply("Hi!"))
.row()
.submenu("Credits", "credits-menu");
const settings = new Menu("credits-menu")
.text("credits", (ctx) => ctx.reply("You reached credits"))
.submenu("Nextlevel", "nextlevel-menu")
.row()
.back("Go Back");
const nextlevel = new Menu("nextlevel-menu")
.text("Nextlevel", (ctx) => ctx.reply("nextlevel"))
.row()
.submenu("navi", "movements")
.row()
.back("Go Back");Another inline menu, this example is from the grammY website. Do not use both, pick one.
const main = new Menu("root-menu")
.text("Welcome", (ctx) => ctx.reply("Hi!")).row()
.submenu("Credits", "credits-menu");
const settings = new Menu("credits-menu")
.text("Show Credits", (ctx) => ctx.reply("Powered by grammY"))
.back("Go Back");The code below activates the menu at the root level because (main) is linking to the top level menu const main.
bot.use(main);Now all we need to do is add a command to bring up the menu. As you can see below, again we have referenced { reply_markup: main }. This is calling our root level menu and the other menus cascade from that.
All we need now is to start the bot with bot.start();.
// Start the bot
bot.start();And that’s it! lol.
BONUS: Here’s how to add more commands to your bot.
// Handle '/help' command
bot.command("help", (ctx) => {
ctx.reply(help);
});
// Handle '/rules' command
bot.command("rules", (ctx) => {
ctx.reply(rules);
});If we want a message to popup with help information whenever anyone types /help we can do this
// Help menu
const help = `
The HELP menu:
1. **Help 1**
2. Help 2
3. Help 3
`;And the same for /rules
// Define bot rules
const rules = `
RULES that MUST always be followed at all times:
1. Rule 1
2. Rule 2
3. Rule 3
`;The Full File
// bot.js
// Import the grammy library
const { Bot } = require("grammy");
const { Menu } = require("@grammyjs/menu");
// Load environment variables from .env file
require("dotenv").config();
// Initialize bot with bot token from .env file
const bot = new Bot(process.env.BOT_TOKEN);
// Handle '/start' command
bot.command('start', (ctx) => {
ctx.reply('Welcome to da botty!');
});
const main = new Menu("root-menu")
  .text("Welcome", (ctx) => ctx.reply("Hi!"))
  .row()
  .submenu("Credits", "credits-menu");

const settings = new Menu("credits-menu")
  .text("credits", (ctx) => ctx.reply("You reached credits"))
  .submenu("Nextlevel", "nextlevel-menu")
  .row()
  .back("Go Back");

const nextlevel = new Menu("nextlevel-menu")
  .text("Nextlevel", (ctx) => ctx.reply("nextlevel"))
  .row()
  .submenu("navi", "movements")
  .row()
  .back("Go Back");
// Register settings menu at main menu.
main.register(settings);
main.register(nextlevel);
// Make it interactive.
bot.use(main);
bot.command("menu", async (ctx) => {
// Send the menu.
await ctx.reply("Check out this menu:", { reply_markup: main });
});
// Define bot rules
const rules = `
RULES that MUST always be followed at all times:
1. Rule 1
2. Rule 2
3. Rule 3
`;
// Help menu
const help = `
The HELP menu:
1. **Help 1**
2. Help 2
3. Help 3
`;
// Handle '/help' command
bot.command("help", (ctx) => {
ctx.reply(help);
});
// Handle '/rules' command
bot.command("rules", (ctx) => {
ctx.reply(rules);
});
// Start the bot
bot.start();
Complete
We can now run the bot with node bot.js and you should have a response from your bot on Telegram when you send the start command!
Affiliate Links
Some great affiliate links give you free cash to spend on VPS. If you use these links I will get a small commission if you choose to sign up.
- Vultr.com – $100 free to spend on VPS
- DigitalOcean.com – £200 to spend on all services including VPS
- Atlantic.net – 1 Core 2GB RAM VPS FREE for 12 months from signup + $15
- Hetzner Cloud – $20 Free to use on all products
- GSuite – Google Workspace 10% off the first year
- Add
6AKCQG7CAFYCQWAto your Google Workspace Account